
Under Layout ↗ in Setup you create your own fields for leads and deals, group them into sections and decide where they appear in the detail view. The page shows the layout exactly as it appears in the lead or deal detail view, just with tools for editing. The layout applies to your whole account. Admins can edit it.
Contents
- How the page is structured
- Creating a field from the palette
- Field types
- Sections
- Moving, editing, hiding and restoring fields
- Custom fields in the lead and deal detail view
- Next
How the page is structured
At the top you switch between Leads and Deals. Each module has its own layout, a field for leads does not appear on deals and vice versa. The top right shows how many fields already exist. Each module can have at most 100 active fields.
On the left is the Field types palette (at the top on a phone, collapsible). Next to it you see the layout in the order of the detail view:
- The built-in blocks such as pipeline & status, contact, company, details and address (deals have no address) are shown in grey at their real position, with the note Standard fields, not editable. They are there for orientation and cannot be changed here.
- Below them come your sections with their fields, in the same two-column grid as the detail view.
- Additional data holds fields without a section of their own. It comes after your sections and before the system block.
Each field is shown as a tile like in the detail view: the name at the top, below it a placeholder that matches the type (for example an empty checkbox, €0.00 or DD.MM.YYYY), then the type and API name. Next to the name you see how many records have a value, the pencil for editing and the eye for hiding. The handle for moving sits to the left of the name.
Creating a field from the palette
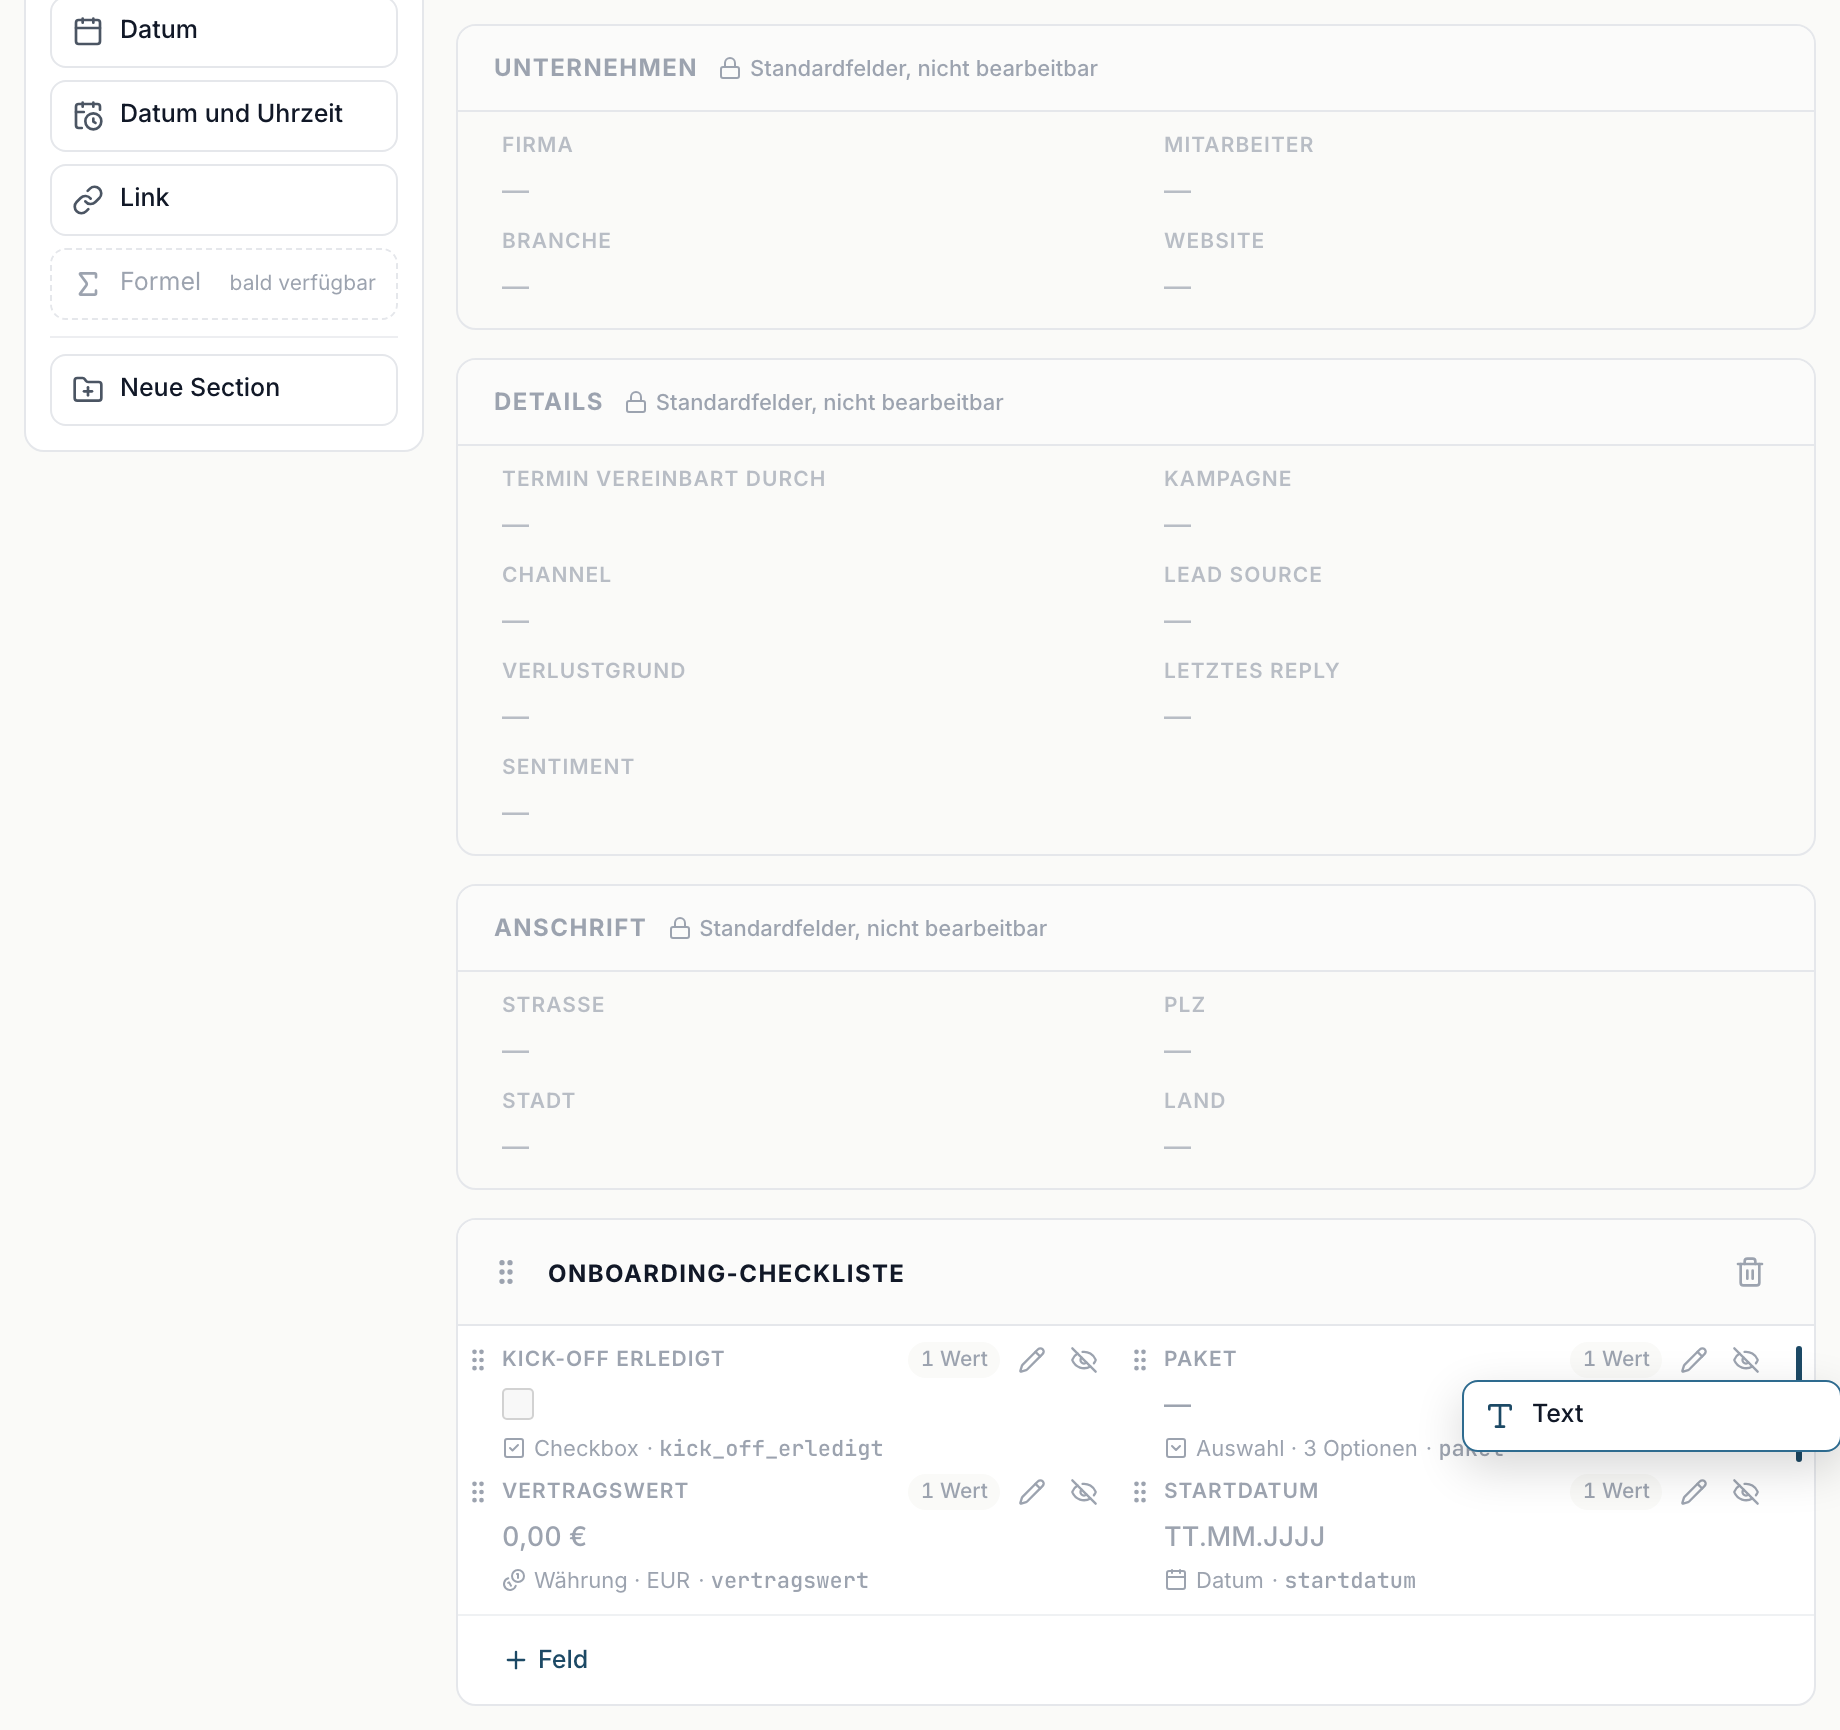
- Drag a tile from the palette to the spot in the grid where the field should go. A line between two fields shows where it will land. The grey standard blocks do not accept fields.
- When you let go, the New field dialog opens. The type is preselected, section and position are taken over.
- Enter the name in Name. Below it you see the API name. It is generated automatically from the name and never changes, even if you rename the field later. The API, webhooks and the import use it to address the field.
- For Dropdown and Multi-select you add the options. For Currency you pick the currency.
- Create field puts the field exactly where you chose. Cancel changes nothing.
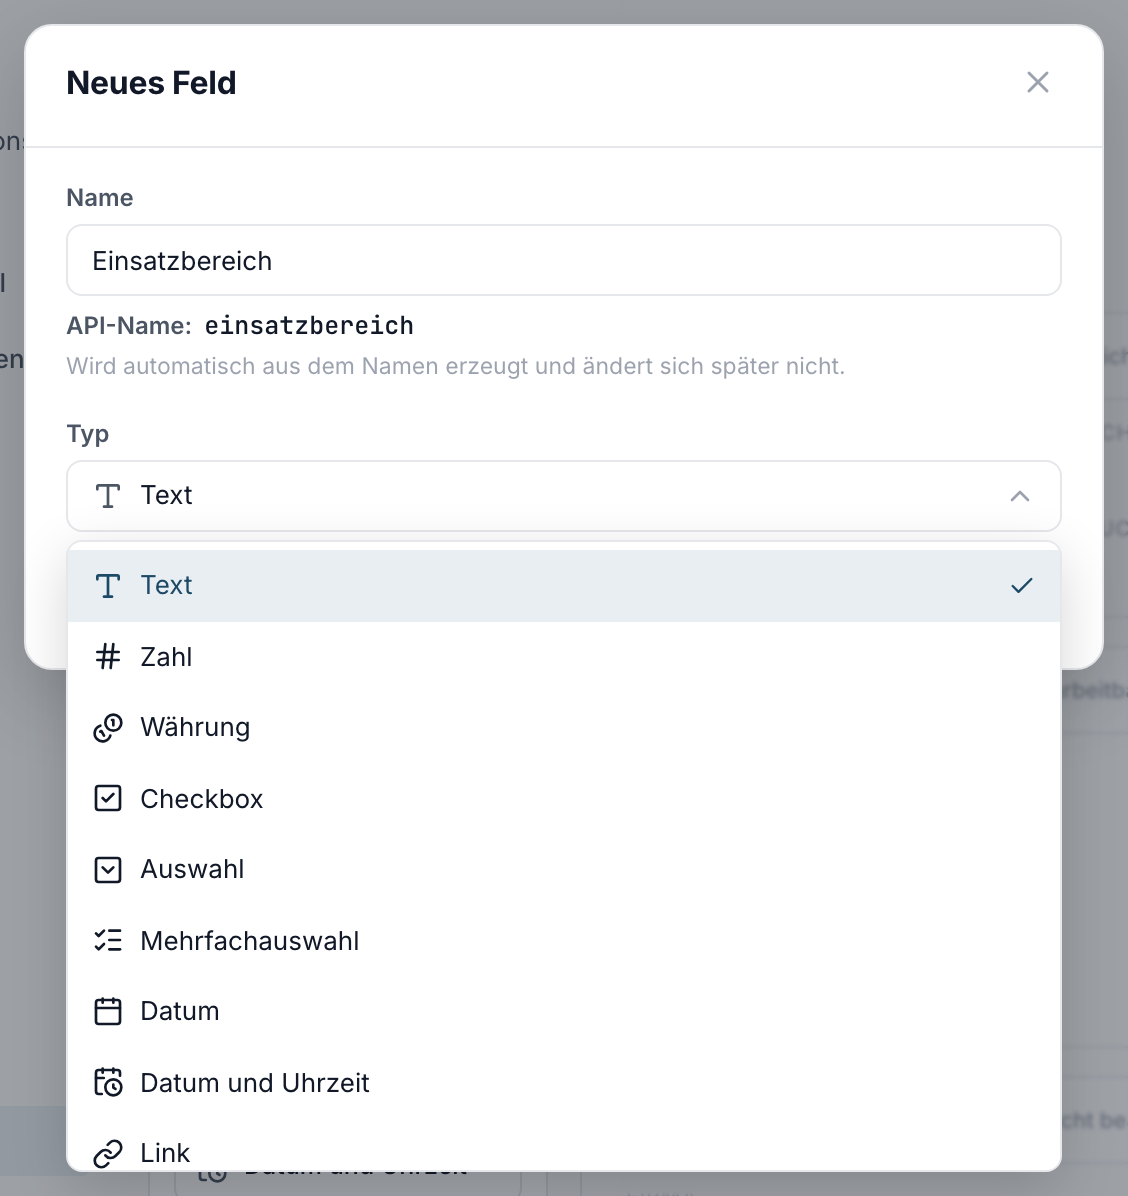
It also works without dragging: click a tile (or select it with the keyboard and press Enter). The field is then added to the end of Additional data. Field below a section adds a field directly to the end of that section.
Field types
| Type | Use it for | Note |
|---|---|---|
| Text | free-form details, multi-line too | up to 10,000 characters |
| Number | quantities and values you calculate with | IDs such as customer or tracking numbers are better created as text so leading zeros are kept |
| Currency | amounts | one currency per field |
| Checkbox | yes or no | |
| Dropdown | exactly one option from a list | options sorted manually or alphabetically |
| Multi-select | several options from a list | |
| Date | a day | |
| Date and time | a day and a time | |
| Link | a web address | https:// is added if missing |
Formula is shown in the palette as coming soon and cannot be created yet.
The type is fixed once the field exists, because the stored values depend on it. If you need a different type, create a new field and hide the old one.
Sections
Sections group related fields under a heading, for example "Contract" or "Onboarding".
- Create: Drag the New section tile between two sections or click it. You can also use Add section above Additional data. Enter a title and confirm with Create.
- Rename: Click the section title and change it.
- Sort: Drag the section by the handle to the left of its heading. Additional data always stays after your sections.
- Delete: The bin on the right of the heading (Delete section) only removes the heading. The fields move to Additional data, all values are kept.
Moving, editing, hiding and restoring fields
- Move: Drag a field by its handle to another spot in the grid, within a section or into another section. With the keyboard: focus the handle, press space, use the arrow keys, space to drop, escape to cancel.
- Edit: The pencil lets you change the name, options or currency. The API name and the type stay the same.
- Hide: The eye (Hide field) removes the field from the detail view. The stored values are kept, nothing is lost. Hidden fields do not count toward the limit.
- Restore: Under Hidden fields you bring a field back with Restore. It reappears with all its values at the end of Additional data.
If you remove an option from a dropdown, records that use it keep their value. In the detail view it is shown in grey as a removed option.
Custom fields in the lead and deal detail view
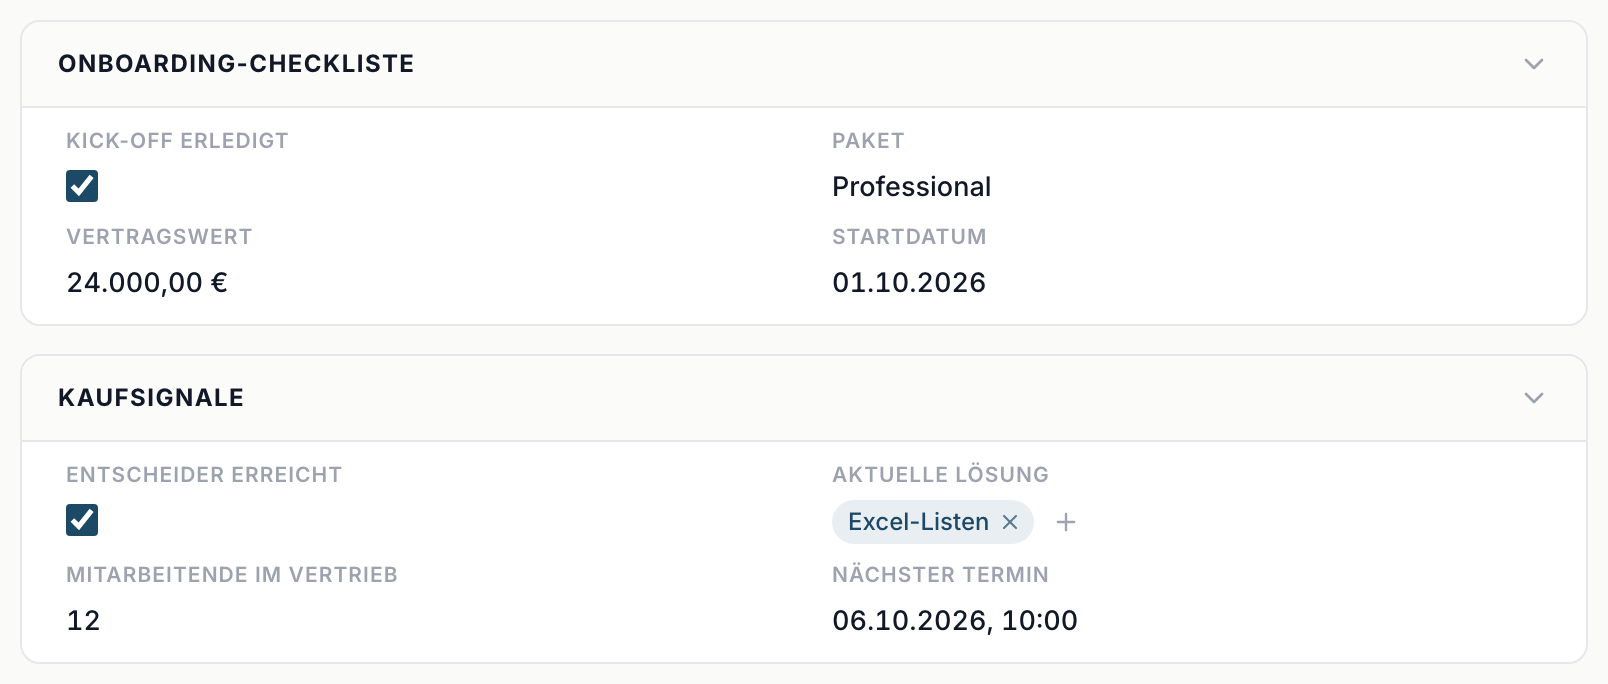
In the detail view of a lead or deal your sections appear exactly where you see them in the layout. This is how you maintain the values:
- Checkbox: tick or untick it, which saves right away.
- Dropdown: click the value to open the list. The top option (a dash) clears the field.
- Multi-select: "+" lets you pick options, the "×" on an option removes it.
- Date and date and time: click the value to open the calendar, the "×" clears the field.
- Text, number and currency: click the value to edit it.
- Link: clicking opens the address, the pencil next to it lets you edit it.
Clearing a field removes the value.
You can also create or fill custom fields for leads during the lead import. Via the API and webhooks the values are in the custom_data object, see inDeal API: create and update leads.